Now Reading: How to Start PC Without Power Button
-
01
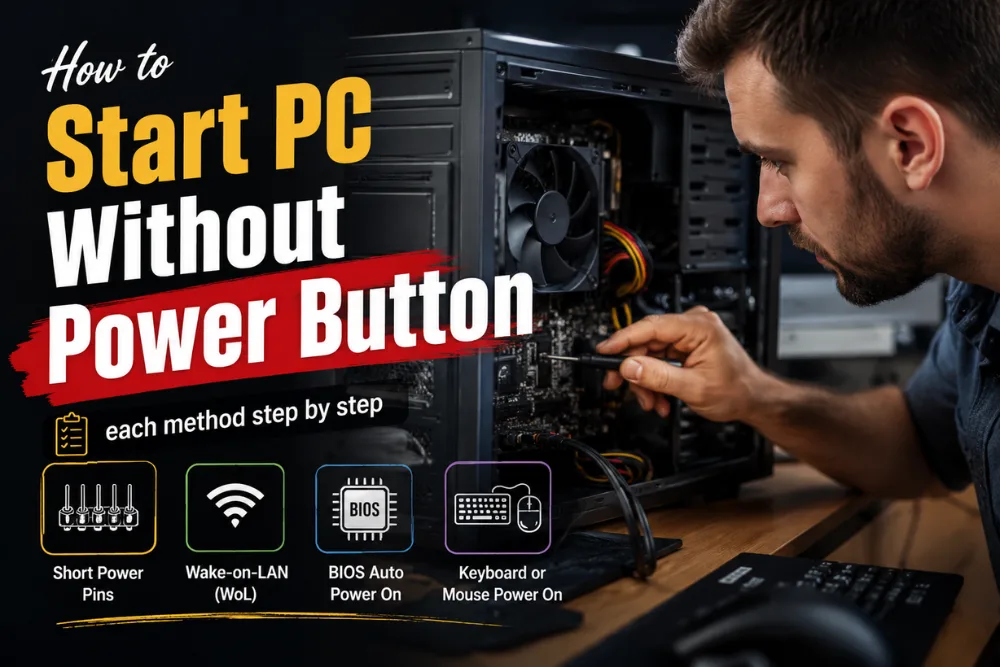
How to Start PC Without Power Button
We’ve all been there, you press the power button on your PC, and… nothing happens. It can be frustrating, especially if you have important work to do or you’re not sure whether the problem is with the button or something more serious.
The good news is that a broken or unresponsive power button doesn’t always mean your computer is dead.
In many cases, there are safe and practical ways to turn on your PC without using the physical power button. Whether you want to short the motherboard power pins, enable Wake-on-LAN, configure your BIOS for automatic startup, or simply understand your repair options, this guide covers everything you need to know.
We’ll walk through each method step by step so you can choose the one that works best for your desktop computer.
How to Power On a Desktop PC Without Using the Physical Power Button
If your desktop PC’s power button is broken or difficult to access, you can still turn on your computer using several reliable methods. Modern motherboards include built-in features that make it possible to start your PC without pressing the physical power switch. Depending on your motherboard model and BIOS settings, you can even power on your computer remotely. Below are the most effective options to help you boot your desktop safely.
Enable “Power On After Power Loss” in BIOS
One of the safest ways to power on your desktop without the physical power button is by enabling the Power On After Power Loss feature in your BIOS or UEFI settings. This option may also appear as Restore on AC Power Loss or State After Power Failure.
Once enabled, your PC will automatically boot whenever it receives power. Pairing this feature with a smart plug allows you to remotely switch the power on and off, making it a convenient solution for home servers or computers placed in hard-to-reach locations. Simply enter the BIOS during startup, locate the power management settings, enable the feature, save the changes, and exit.
Alternative Methods to Turn On Your Desktop
If BIOS-based startup isn’t suitable, you can use other methods depending on your hardware. Carefully shorting the motherboard’s power switch pins with a metal screwdriver will simulate pressing the power button and start the PC. This method should only be used with caution.
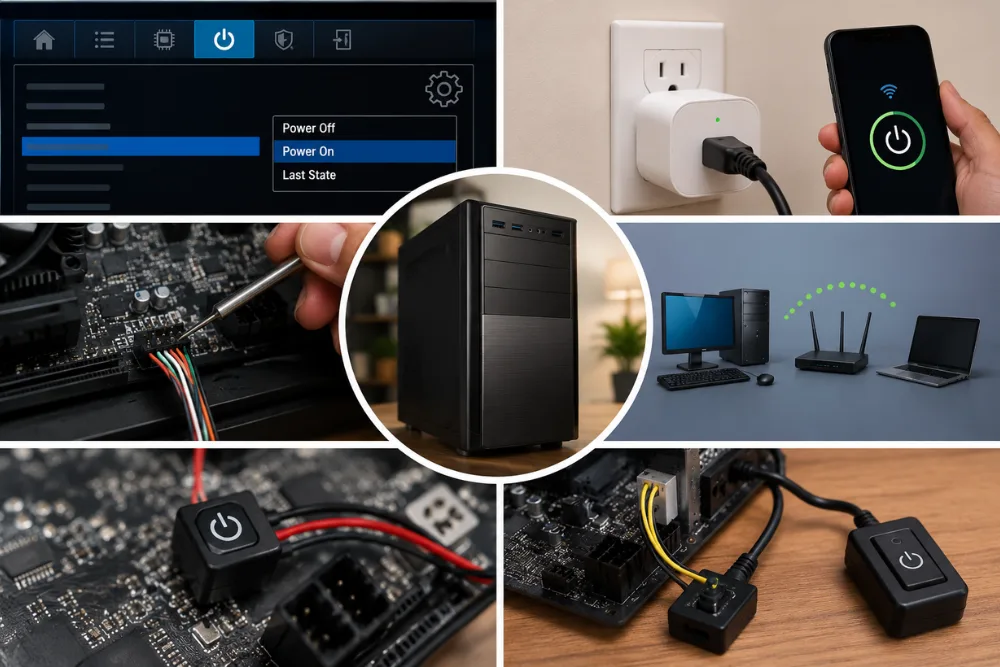
Another option is Wake-on-LAN (WoL), which lets you power on your computer remotely through your network after enabling the feature in BIOS and your operating system. You can also install an external power switch connected directly to the motherboard, providing a simple replacement if the original button has failed.
| Method | Best For | Difficulty | Safety |
|---|---|---|---|
| Power On After Power Loss | Remote startup with smart plugs | Easy | 5 star |
| Short Motherboard Power Pins | Broken power button | Medium | 3 star |
| Wake-on-LAN (WoL) | Remote network access | Medium | 4 star |
| External Power Switch | Permanent replacement | Easy | 4 star |
How to Power On a Desktop Computer With a Broken Front Panel Button
A broken front panel power button doesn’t always mean your desktop computer is unusable. Whether the button is physically stuck, unresponsive, or disconnected from the motherboard, there are several ways to start your PC safely. Before attempting any hardware-related fixes, disconnect the power cable and take precautions against static electricity to protect your computer’s components.
Check the Front Panel Connection and Use Alternative Buttons
Start by inspecting the connection between the power button and the motherboard. Open the computer case and locate the Power SW cable connected to the front-panel header. If the connector has become loose, firmly reconnect it to the correct pins. A disconnected cable is a common cause of a non-working power button.
If your desktop case includes a Reset button, you may also be able to use it as a temporary alternative, depending on your motherboard configuration. This simple solution can help you start the computer without replacing the faulty power button immediately.
Bypass the Broken Power Button Safely
If the front panel button has failed completely, you can manually power on the PC by briefly touching the Power SW pins on the motherboard with a metal screwdriver. This mimics pressing the power button and should only require a quick contact between the two pins. Avoid touching other motherboard components while performing this step.
If the computer still refuses to start, consider resetting the CMOS using the motherboard’s CMOS jumper. This can resolve startup problems caused by BIOS configuration issues or power surges. If none of these methods work, the problem may involve the power supply, motherboard, or other hardware, and professional repair is recommended.
| Solution | When to Use | Difficulty | Recommended |
|---|---|---|---|
| Reconnect Power SW Cable | Loose front-panel connector | Easy | Yes |
| Use Reset Button | Reset button available | Easy | If Supported |
| Short Power SW Pins | Broken power button | Medium | With Caution |
| Reset CMOS Jumper | BIOS or startup issues | Medium | If Needed |
Methods to Start a Computer When the Power Button Is Broken
A broken power button doesn’t necessarily mean your computer is unusable. Whether you’re using a laptop or pc, there are several alternative methods to turn on the device without relying on the physical power switch. Some options require changing BIOS settings, while others involve simple hardware work. Before opening your computer, always disconnect it from power and follow proper anti-static precautions to avoid damaging sensitive components.
Desktop PC Methods to Power On Without a Working Button
Desktop computers offer the most flexibility when the power button fails. The quickest solution is to locate the Power SW pins on the motherboard’s front-panel header and briefly touch them together with a metal screwdriver. This simulates pressing the power button and starts the system.
Another convenient method is Wake-on-LAN (WoL) as mentioned earlier. If your motherboard supports it and the feature was enabled in BIOS, you can remotely power on your computer by sending a “magic packet” from another device connected to the same network. Some motherboards also let you start the PC by pressing a specific keyboard key or clicking a USB mouse after enabling the corresponding BIOS setting.
Also read: 10 Best Cybersecurity Tips for Protecting My Home WiFi Network
Laptop Alternatives and Safety Tips
Laptops have fewer workarounds because the power button is integrated into the device. Depending on the manufacturer, simply opening the lid, connecting the charger, or using a specific keyboard shortcut may automatically power on the laptop. Some business laptops also support external docking stations with dedicated power buttons.
If none of these methods work, replacing the faulty power button is usually the safest long-term solution. Unless you’re experienced with computer hardware, consider seeking professional repair assistance to avoid accidental damage.
| Method | Desktop | Laptop | Difficulty |
|---|---|---|---|
| Short Motherboard Power Pins | Yes | No | Medium |
| Wake-on-LAN (WoL) | Yes | Yes | Medium |
| Keyboard or Mouse Power On | Yes | Limited | Easy |
| Open Lid or Connect Charger | No | Yes | Easy |
| Replace Power Button | Yes | Yes | Hard |
Emergency Boot Methods for a PC With a Faulty Power Switch
A faulty power switch doesn’t always leave your PC unusable. If the computer’s internal hardware is functioning correctly, you can use several emergency boot methods to start the system without pressing the physical power button. These solutions are particularly useful when the switch suddenly fails and you need temporary access to your computer before replacing the faulty component.
Enable Automatic Power-On After Power Loss
One of the easiest emergency solutions is enabling the Restore on AC Power Loss option in your motherboard’s BIOS or UEFI settings. When this feature is set to Always On, your PC will automatically boot whenever electrical power is restored.
Once configured, you can simply turn the power supply off and on, plug the PC into a live outlet, or use a smart plug to restore power remotely. This method is safe, reliable, and ideal for users who need remote access or want to avoid opening the computer case.
Use a UPS or Alternative Startup Method
If your desktop is connected to an Uninterruptible Power Supply (UPS), its management software may automatically restart the PC after utility power returns. This provides another convenient way to boot the computer without using the faulty power switch.
For systems where automatic restart isn’t available, you can temporarily start the PC by carefully shorting the motherboard’s Power SW pins. Although effective, this method should only be performed if you’re comfortable working inside a computer and understand basic hardware safety practices.
| Emergency Method | Best Use Case | Difficulty | Safety |
|---|---|---|---|
| Auto Power-On After Power Loss | Everyday emergency startup | Easy | 5 star |
| Smart Plug + BIOS Setting | Remote power control | Easy | 5 star |
| UPS Auto Restart | Systems with UPS backup | Easy | 4 star |
| Short Motherboard Power Pins | Broken power switch | Medium | 3 star |
How to Use Motherboard Jumpers to Turn On a PC Without a Case Button
When your case power button is not available or has failed, you can still start your PC by using the motherboard’s front panel header jumpers. This method works by manually shorting the power switch pins, effectively mimicking a press of the power button. It is commonly used for testing systems outside a case or for emergency boot situations.
Prepare the System Safely Before Starting
Before touching any components, completely unplug your PC from the power source. This prevents electrical damage or accidental short circuits. It is also important to discharge static electricity by touching a grounded metal object. If your motherboard is outside the case, place it on a non-conductive surface such as a cardboard box or the motherboard packaging.
Make sure you are working in a well-lit area and avoid using excessive force or metal tools that could slip onto other components.
Locate and Short the Power Switch Pins
Find the front panel header on your motherboard, usually located at the bottom-right section. This header contains small pins labeled PWR SW, PWR_BTN, or something similar depending on the manufacturer.
To start the PC, take a small metal object such as a screwdriver and briefly touch the two power switch pins at the same time. This creates a short circuit that sends the “power on” signal to the motherboard. As soon as the system begins to boot (fans spin or LEDs light up), immediately remove the tool.
This is exactly the same action as pressing the case power button—just done manually.
Safety Guidelines and Best Practices
| Step | Action | Why It Matters |
|---|---|---|
| 1 | Unplug PC before setup | Prevents electrical shock |
| 2 | Ground yourself | Avoids static damage |
| 3 | Identify PWR SW pins | Ensures correct connection |
| 4 | Briefly short pins | Triggers safe power-on |
| 5 | Remove tool immediately | Prevents motherboard damage |
Never short random pins, as this can damage the motherboard. Always refer to your motherboard manual if you’re unsure of the pin layout. For long-term use, replacing or repairing the case power button is recommended, but this jumper method is a reliable temporary solution when you need to start your PC quickly.
Steps to Short the Power Pins on a Motherboard to Start a Computer
When your PC case power button is not working, you can manually start the system by shorting the motherboard power switch pins. This method safely mimics a normal power button press and is commonly used during troubleshooting or when testing a system outside a case.
Step 1: Prepare the System Safely
Before doing anything, completely unplug the computer from the wall socket. This reduces the risk of accidental short circuits or electrical damage. Ground yourself by touching a metal surface or using an anti-static strap to avoid static electricity damage to components. Place the motherboard on a non-conductive surface if it is outside the case.
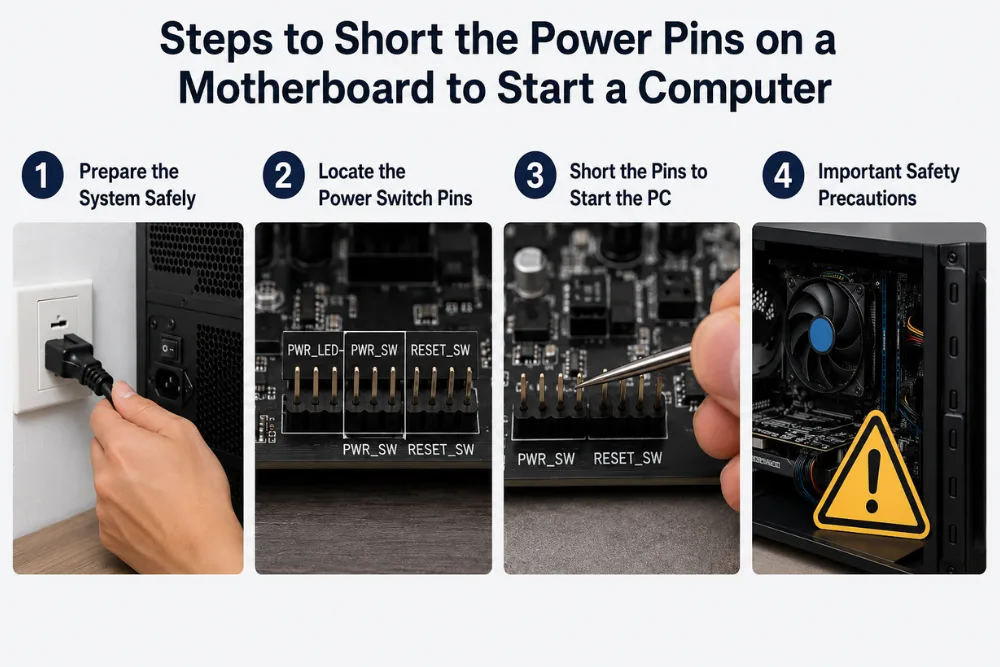
Step 2: Locate the Power Switch Pins
Open the PC case and find the front panel header on the motherboard, usually located along the bottom edge. This small block of pins connects the case buttons and LEDs to the motherboard.
Look for labels such as PWR_SW, PWR_BTN, or POWER SW. These are the exact pins used by the power button. If you’re unsure, always refer to your motherboard manual or manufacturer website for the correct pin layout.
Step 3: Short the Pins to Start the PC
Use a small conductive object such as a flathead screwdriver, tweezers, or a paperclip. Carefully touch both power switch pins at the same time for just a second.
The moment the PC starts (fans spin, LEDs turn on), remove the metal object immediately. This action completes the circuit, sending the same signal as pressing the physical power button.
Step 4: Important Safety Precautions
| Step | Action | Reason |
|---|---|---|
| 1 | Unplug PC before setup | Prevents electrical hazards |
| 2 | Identify correct pins | Avoids motherboard damage |
| 3 | Use small metal tool | Ensures precise contact |
| 4 | Brief contact only | Prevents shorting issues |
| 5 | Remove immediately | Ensures safe boot process |
Avoid touching other pins, as shorting the wrong ones may damage the motherboard. This method should only be used when necessary, and it’s a temporary solution. For long-term use, repairing or replacing the case power button is recommended for safer daily operation.
Steps to Enable Wake-on-LAN to Power On a PC
Wake-on-LAN (WoL) is a useful feature that allows you to power on your computer remotely over a network using a special “magic packet.” To use it, you must configure both BIOS/UEFI settings and your operating system properly. This feature is especially helpful for remote access, home servers, or situations where the physical power button is not easily accessible.
Step 1: Check Hardware and Network Compatibility
Before setting up Wake-on-LAN, ensure your motherboard and Ethernet adapter support it. Most modern desktop network cards support WoL, but wireless adapters generally do not. Also, your PC must be connected to the network using an Ethernet cable for reliable operation.
The system should remain connected to a power source even when turned off, as the network card must still receive standby power to listen for wake signals.
Step 2: Enable Wake-on-LAN in BIOS/UEFI
Restart your computer and enter the BIOS/UEFI setup (usually by pressing Delete, F2, or F12 during startup). Navigate to the Power Management or Advanced section.
Enable settings such as:
- Wake-on-LAN
- Wake on Magic Packet
- Resume by PCI-E Device
Save your changes and exit BIOS.
Step 3: Configure Wake-on-LAN in Windows
In Windows, press Windows + X and open Device Manager. Then:
- Expand Network Adapters
- Right-click your Ethernet adapter → Properties
- Go to Power Management tab
- Enable “Allow this device to wake the computer”
- Go to Advanced tab
- Enable “Wake on Magic Packet”
Click OK to apply changes.
Step 4: Adjust System Settings for Best Results
For better compatibility:
- Disable Fast Startup in Windows
- Ensure firewall allows Wake-on-LAN packets
- Use sleep or hibernation modes supported by WoL (S3/S4 states)
Step 5: Use Wake-on-LAN to Power On Your PC
Use a Wake-on-LAN tool (mobile app or another PC) and enter your computer’s MAC address. Send a “magic packet” over the network.
If configured correctly, your PC will power on or wake from sleep almost instantly.
Quick Reference Table
| Step | Action | Purpose |
|---|---|---|
| BIOS Setup | Enable WoL options | Allow hardware wake support |
| Windows Settings | Enable adapter wake options | Permit OS-level wake |
| Network Setup | Use Ethernet connection | Ensure reliable signal |
| WoL Tool | Send magic packet | Trigger remote power-on |
Wake-on-LAN is one of the most efficient ways to remotely start a PC, especially when the physical power button is not accessible or not working.
Setting Up BIOS to Automatically Power On After a Power Failure
Configuring your BIOS/UEFI to automatically power on after a power failure is a useful feature for desktops used as servers, CCTV systems, or always-on machines. Once enabled, your PC will automatically restart when electricity is restored, removing the need to press the physical power button.
Step 1: Enter BIOS/UEFI Settings
Restart your computer and enter BIOS/UEFI during startup. You usually do this by pressing keys like Delete, F2, F10, F12, or Esc, depending on your motherboard brand. The correct key is often shown briefly on the screen during boot.
Once inside BIOS, use arrow keys (or mouse in modern UEFI interfaces) to navigate.
Step 2: Find Power Management Settings
Look for a menu labeled Power Management, Advanced, ACPI Settings, or similar. Different motherboard manufacturers use different names, so the option may not be in the same place on every system.
Step 3: Enable “Restore on AC Power Loss”
Locate an option such as:
- Restore on AC Power Loss
- AC Back Function
- After Power Failure
- Power On After Power Loss
Set it to “Power On” or “Always On.” This ensures that whenever power returns, the system automatically boots up without requiring the front panel power button.
Step 4: Save and Exit BIOS
After making changes, select Save & Exit Setup. Your PC will restart and apply the new settings. From now on, your system should automatically power on whenever power is restored.
Step 5: Practical Use Cases and Safety Tips
| Feature | Purpose | Benefit |
|---|---|---|
| AC Power Recovery | Auto boot after outage | Hands-free startup |
| UPS Support | Prevent sudden shutdown | Stable operation |
| Surge Protector | Protect hardware | Prevent damage |
This feature is especially useful when combined with a UPS (Uninterruptible Power Supply) or a smart plug, allowing controlled restarts without using the physical power button.
However, keep in mind that BIOS names and locations vary across manufacturers. If you can’t find the setting, refer to your motherboard manual or support page.
Once enabled correctly, your PC becomes much more resilient to power interruptions and can start automatically without manual intervention.
Cost of Professional Service to Repair a Non-Functional PC Power Button
If your desktop PC’s power button has stopped working, professional repair is often the safest and most reliable solution. In most cases, the issue can be fixed by replacing the faulty power switch, reconnecting the front-panel cable, or repairing the case wiring. The total cost depends on the diagnosis, replacement parts, and local labor charges.
Typical Repair Costs
Most repair shops begin with a diagnostic inspection to identify whether the problem lies with the power button, motherboard, or power supply. A simple power button replacement is usually inexpensive, while motherboard-related repairs can significantly increase the overall cost.
Labor charges vary by region and technician experience, but many computer repair services charge an hourly rate or a flat fee for basic hardware repairs. If only the front-panel switch needs replacing, the repair is generally completed within a single visit.
Factors That Affect the Repair Price
Several factors determine how much you’ll pay for the repair. Desktop computers are easier to service than laptops, making power button repairs more affordable. If the problem extends to the motherboard, power supply unit (PSU), or internal wiring, additional parts and labor may be required.
Before approving any repair, ask for a written estimate that includes diagnostic fees, replacement parts, labor charges, and warranty information. Comparing quotes from multiple repair shops can also help you find the best value.
| Repair Service | Estimated Cost (USD) | Typical Repair Time |
|---|---|---|
| Power Button Diagnostic | $59–$89 | 30–60 minutes |
| Power Button Replacement | $79–$150 | 30–90 minutes |
| Front Panel Cable Repair | $80–$120 | 30–60 minutes |
| Motherboard Power Circuit Repair | $150–$250+ | 1–3 hours |
For most desktop PCs, repairing a faulty power button is considerably less expensive than replacing the entire computer. If your system is otherwise functioning normally, professional repair is usually a cost-effective long-term solution.
Conclusion
A faulty power button doesn’t necessarily mean your computer is unusable. From manually shorting the motherboard power pins to enabling Wake-on-LAN or configuring your BIOS for automatic startup, there are several reliable ways to turn on your PC without the physical button.
If you’re comfortable working with computer hardware, many of these methods can get your system running in just a few minutes. However, if the issue appears to be hardware-related or you’re unsure about opening your PC, seeking professional repair is the safest option. Hopefully, this guide has helped you find the right solution and get your computer back up and running without unnecessary stress.
Frequently Asked Questions
1. Can I start my PC without the power button?
Yes. If your desktop PC’s power button is broken, you can temporarily start it by shorting the motherboard’s power switch pins. Other options include enabling Wake-on-LAN, configuring BIOS to power on after power loss, or using an external power switch.
2. Is it safe to short the motherboard power pins?
Yes, if done correctly. Briefly touching only the two Power SW pins with a metal screwdriver simulates pressing the power button. Avoid touching other pins or components, and always follow anti-static precautions.
3. Can I turn on my PC remotely?
Yes. If your motherboard supports Wake-on-LAN (WoL), you can power on your computer remotely by sending a magic packet over your local network. This feature must be enabled in both the BIOS and Windows settings.
4. Will enabling “Power On After Power Loss” automatically start my PC?
Yes. Once enabled in the BIOS, your computer will automatically boot whenever electrical power is restored. This is useful if you use a smart plug or need your PC to restart after a power outage.
5. How much does it cost to fix a broken PC power button?
For most desktop computers, repairing or replacing a faulty power button typically costs between $59 and $150, depending on the repair shop, labor charges, and whether additional hardware needs to be replaced.
References used:
How do I power on my PC without pressing the power button?
How to Fix a Stuck PC Power Button
How can I test the power button on my PC if the motherboard light is on but it won’t turn on?
How to Turn on Your PC with a Screwdriver
How To Turn On A Motherboard Without A Case Or Power Switch
Set Up Automatic Reboot of Windows Computers

Dony Garvasis is the founder of Search Ethics, a freelance SEO consultant, and a passionate technology blogger. With over 8 years of experience in SEO, blogging and content marketing, I provide expert content on Tech, digital marketing, SEO, Artificial intelligence, gadgets, science, automobiles, lifestyle, tips, tutorials and much more. My mission is simple: Ethical Search, Genuine Results! I will make sure people everywhere get trustworthy and helpful information.